
April 13, 2013
BD Forex Automation System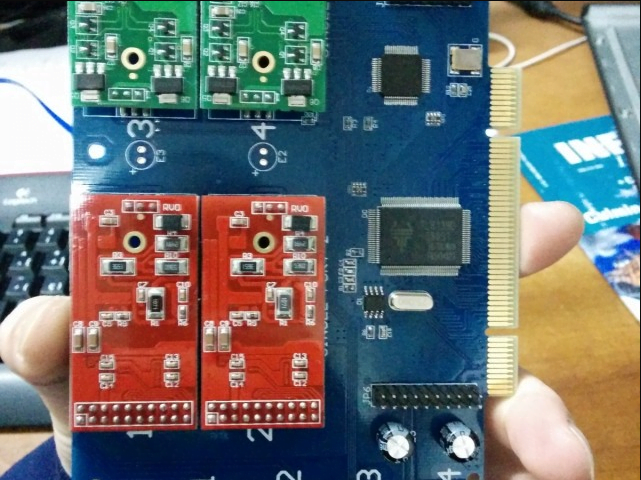
Garage DataCenter Evolution
THIS IS NOT RELATED TO THE OTHER SERVERS RUNNING IN Los Angeles and Secaucus. This is running at my house. Check the network diagram so you know what I’m talking about.
Garage Data Center project. Through the years.
So, the project’s whole point was to start the skeleton of the company I built after this. Funny enough, the company is still around; we’re again hosting websites, databases, VPN’s, and we’re moving more data every year. We now want to share with you how this started and evolved.
The funny, the sad, and the truth.
We started with a negative budget; lol yeah, we started without any money. We would work here later on, but not for long. Soon it just turned into running more and more machines.

The place:
It was located behind my house, in a garage. We’d take half the space of the garage, and we’d fix it up enough to hold the servers safely. It’s worth to notice this is in Montevideo, Uruguay. Most things are crazy expensive here. And we did this without a budget. We mostly bought what we could. And manage it as we moved forward. God only knows what we would have built with a budget.
2009 The beginning.
Specs:
1x Router (I think it was a PIV HT, 3 GHz? 1 GB RAM?) [PfSense ?]
1x Server (Dual Core? 4 GB RAM? Running Ubuntu). [10.04 ?]
1x Switch 100 MB FD 8 port.

A connection was: 10 MiB Down and 2 Up, I believe. Through copper PPPoE.
Here is where we’d put the lab. Drinks, chairs that later on moved to computer chairs, some drinks (Just kidding, we were tired since we were working.) It’s also worth mentioning that this was complicated also since all we did here had to be easily removed (Remember this is my Grandmother’s house).

This is the back, where the main entrance would be, and what was extremely convenient to put the machines inside.
Haha, that old monitor. Can you believe that’s been working for the past 12 years?
Planning on the batteries correctly, sizing them, wiring them, modifying the UPS, buying an inverter, and trying to make it work… that whole process doesn’t have pictures, unfortunately, as of the writing of this post since I don’t have them with me. If I do find them, I’ll upload them.
But we had to measure all machines’ power consumption, figure out what’s crucial or not, figure out the wiring we’d be using to be sure nothing would catch fire. Choose between car batteries or deep drain, and choose the Air Conditioning. Bear in mind we’d have to be able to dismantle this place in hours in the event of the house being sold, or we move out.
In short:
AC 12000 BTU modified portable AC unit was chosen and modified because it was a single tube one, instead of a double which proved to be horrible performing low cooling the systems. So we reverse-engineered it and figured out a way to fix it. We’ll include pictures of this.
Another thing we wanted was climate control (Humidity and Temperature). For that, we used a Raspberry Pi 1; now we changed to Raspberry Pi 2 B.
We’ll add the pictures on how we pulled together the UPS monitoring and how we manage the AC Unit inside the workplace because it’s also worth noting that we did all this. After all, I planned to move to the United States while leaving all this equipment partially unattended. And if the moment came, I’d have to log into any of these systems, or there was some overheating problem. I’d have to step in remotely to fix it.
Don’t worry, my brother and parents are ten steps away, in case of a REAL emergency. Still, I believe it’s somewhat refreshing to share this experience with me. Soon I’ll be departing hopefully to the US, leaving all this running. Let’s see how well that experiment holds lol.
Yes, evolution in progress. Lol. That mess needs some work, but unfortunately. We don’t have that much time. I’ll try to take pictures after I get to it.
Okay, those are general pictures of some of the servers running here. Let’s get more into detail.
Common to all servers:

- Dual Gigabit Network cards.
- Servers run RAID 1 for the OS.
- Servers run Debian 8 with modified Kernel and custom-built KVM Image.
- Servers have 10+ GB RAM.
- System images are stored in a different RAID 1.
- We store data on top of GlusterFS, and some of it on USB Drives! :O.
Done, that being said we have:
- 1x I7 Server
- 1x I3 Server
- 2x Core2Duo with VT-d VT-x
- 2x Core2Duo without VT-d
Storage:
root@mvd02:~# df -h
Filesystem            Size  Used Avail Use% Mounted on
/dev/md0               83G   13G   67G  16% /
udev                   10M     0   10M   0% /dev
tmpfs                 3.2G   90M  3.1G   3% /run
tmpfs                 7.9G     0  7.9G   0% /dev/shm
tmpfs                 5.0M     0  5.0M   0% /run/lock
tmpfs                 7.9G     0  7.9G   0% /sys/fs/cgroup
/dev/md2              825G  631G  153G  81% /home
/dev/sdd1             2.7T  1.1T  1.6T  41% /mnt/ex3TBUSB
/dev/sde2             917G  742G  129G  86% /data/glusterfs/backup/brick1
/dev/sdb1             1.8T   90G  1.7T   6% /data/glusterfs/takelan/brick1
tmpfs                 1.6G  4.0K  1.6G   1% /run/user/1000
tmpfs                 1.6G     0  1.6G   0% /run/user/0
127.0.0.1:/takelan    1.8T   90G  1.7T   6% /mnt/glusterfs/takelan
127.0.0.1:/backup     917G  742G  129G  86% /mnt/glusterfs/backup
10.1.0.3:/no-replica  1.4T  301G 1005G  24% /mnt/glusterfs/no-replica
root@mvd01:~# df -h
Filesystem             Size  Used Avail Use% Mounted on
/dev/md0                83G   18G   61G  22% /
udev                    10M     0   10M   0% /dev
tmpfs                  4.7G   74M  4.6G   2% /run
tmpfs                   12G   68K   12G   1% /dev/shm
tmpfs                  5.0M  4.0K  5.0M   1% /run/lock
tmpfs                   12G     0   12G   0% /sys/fs/cgroup
/dev/md2               825G  576G  208G  74% /home
/dev/sdd1              1.8T   90G  1.7T   6% /data/glusterfs/takelan/brick1
/dev/sdf1              917G  742G  129G  86% /data/glusterfs/backup/brick1
/dev/sde1              459G  190G  246G  44% /data/glusterfs/no-replica/brick2
/dev/sdc2              917G  112G  759G  13% /data/glusterfs/no-replica/brick1
/dev/sdc1              917G  742G  129G  86% /data/glusterfs/backup/brick2
127.0.0.1:/takelan     1.8T   90G  1.7T   6% /mnt/glusterfs/takelan
127.0.0.1:/backup      917G  742G  129G  86% /mnt/glusterfs/backup
tmpfs                  2.4G  8.0K  2.4G   1% /run/user/1000
tmpfs                  2.4G     0  2.4G   0% /run/user/0
127.0.0.1:/no-replica  1.4T  301G 1005G  24% /mnt/glusterfs/no-replica
root@mvd03:~# df -h
Filesystem              Size  Used Avail Use% Mounted on
/dev/sda2               136G   56G   67G  46% /
udev                     10M     0   10M   0% /dev
tmpfs                   1.2G  114M 1019M  11% /run
tmpfs                   2.8G     0  2.8G   0% /dev/shm
tmpfs                   5.0M     0  5.0M   0% /run/lock
tmpfs                   2.8G     0  2.8G   0% /sys/fs/cgroup
/dev/sdb1               917G  246G  626G  29% /mnt/kvm
10.1.0.2:/mnt/ex3TBUSB  2.7T  1.1T  1.6T  41% /mnt/ex3TBUSB
[2.2.6-RELEASE][root@router.uy.takelan.com]/root: df -h
Filesystem                      Size    Used   Avail Capacity  Mounted on
/dev/mirror/pfSenseMirrors1a    443G     12G    396G     3%    /
devfs                           1.0K    1.0K      0B   100%    /dev
/dev/md0                        3.4M    196K    2.9M     6%    /var/run
devfs                           1.0K    1.0K      0B   100%    /var/dhcpd/dev
procfs                          4.0K    4.0K      0B   100%    /proc
Yes, all systems run on RAID 5 | RAID 1, because I’m paranoid and I’ve had drives dying on me at the worst moment.
That being said, it’s not a crazy setup, but it keeps the ball rolling. I get to backup everything, from customers to family. And I get to have tons of storage for myself. You can see above what’s on gluster and what isn’t. All on gluster is also running on a mirror. That’s because, in the event of a server failure, I have the VM’s cloned and ready to spin up. I chose the docker approach since many of my services run on docker to keep the VM’s as cases, and keep the data straight on GlusterFS and access it through a virtual network adapter in the VM’s.
Security:
- Cameras on roofs of the houses.
- A camera on the perimeter.
- Camera pointing to the south door.
- Camera pointing to the east door.
- Camera pointing to every house’s front perimeter.
- The camera is pointing to the servers.
- The dual firewall on cascade PfSense with CARP.
- VPN Access is strictly limited.
- Suricata in place to have a closer inspection of the network.
Network:
Main backbone is 120 MiB down, 13 MiB Up.

This is a close approximation of the data moved by the servers to the outside world.
Why tower casings?
Simple, they are everywhere, and they are cheap. And if there’s one thing I didn’t need is the density or excessive noise. Plus, having them so apart. It allows them to keep the AC low or off except for summertime.
Uninterrumpible Power Supply?:

Yes, from the moment we took this picture, we added two more batteries. They are 90 Amp/h totaling: 360 Amp we have in reserve.
Yes, from the moment we took this picture, we added two more batteries. They are 90 Amp/h totaling: 360 Amp we have in reserve.
So far, I have not tested how long it’ll keep everything except for the AC running. But we added a big turbine inside to keep the components fresh.

It may seem as it’s enormous, but it’s not. We don’t pull more than 600W out of it, EVER. Lol. The problem we have is keeping the servers running for a long.
It’s been 2 years since these two were up… and we haven’t had a single power outage. We also should note that we have triphasic power to this place, and we have a corporate contract with the power company.
You said, temperature control?
This is the AC; you can see on the Air inlet the DHT11 sensor keeping track of the air temperature and humidity before going through the cooling stage. Yes, I know it’s dirty; it’s a lot of duct tape. But hey, if I ever take this down. I want to be able to salvage this AC Unit.
That being said, it works like a charm; the reason for the box below, covering the other inlet, is because this was a portable AC unit. Since it only has one hose initially air from inside, the server room would go outside after cooling the compressor, so instead, I added a second hose with a grid outside, so it’ll pull outside air, cool the compressor, and pull it out. It is not forcing cold air from the inside out. I can make a more extended explanation later and how we noticed this problem.
But it’s pretty straight forward to be honest how we noticed it.
So what have the sensors attached to? How do I remotely control the power of everything inside here without stepping in it?. Simple. Saintsmart 8-Relay board, DHT11 sensor, IR Sensor, big ass contractors for AC, and the primary power grid.
Yes, that box, with a fan, with a CF, SD, red light, and blue thingy, is the box containing the Raspberry Pi, the relay board, etc.
The fan had to be glued and duct-taped along with the cable since it’s high RPM and vibration. Unfortunately, we had to use silicone plus ducktape since the top part of the box is tight.

The box has four holes, one front for the USB cable, power cable. 1 Back for power. 2 Sides to connect to the relay board.
The raspberry is running a PHP script that has a summary of all services as NUT for the UPS, Relay board status, and Air Conditioning. Along with a JSON webserver pulled by a JAVA application.

In case you’re wondering, that’s the DHT11 sensor I told you about. 0-50C and 20 – 95% Humidity. Perfect for my scope, since 95%+ of Relative Humidity means the data center is submerged underwater, and 50 Celcius + means the data center is probably on fire.
I can explain how I connected all that later on; I forgot to show a picture of the IR transmitter taped to the AC. And there, you can see the AC with the sensor and the receiver while I was testing if the GPIO pins would provide enough power to drive the IR transmitter.

What about the networking gear? Why that white wire in the way? No idea. Lol, but probably dust?. Gray cable is CAT6.
But we also have IP Phones… how? Digium card, shown below.


There you can see my development Raspberry Pi 2, and the one that’s going into service. The parts you see with long black tape is because there’s a metal wire inside to shape.
The cables once I place them. Who cares!. No one cares!.
DLink KVM Switch, Lantronix Spider, connected to it. With Aux and Main power.

The Lantronix Spider is an excellent device along with the Dlink Switch. It allows me to work on the systems remotely without worrying about getting locked up on boot or having to change the BIOS. It’s a great alternative also to
Sorry, unfortunately, I cannot show any longer. Things have changed since then, and it doesn’t seem like the best idea to be publishing pictures on how it looks right this second, just for security. No worries. As time goes by and I change it more, you’ll get updates.
Also, stick around for posts on how I manage all the systems. How I did the whole Raspberry Pi project and all I’m capable of doing without stepping in that room.

